
All about the BSidesKC 2019 Badges
This year, Kevin drew the short straw to give the talk about our badge for Bsides KC 2019. Aptly titled The Hardest Way to Present at a Conference he explains a lot about the development process and why making a conference badge isn’t (in itself) worth free admission! This year, to up the difficulty level and take advantage of the fact that we had more than 2 months we created TWO badges. We wanted something special for our growing number of youth attendees and it really seems to have paid off!
If you have never designed a custom electronics project, there are a lot of things that tend to pop up when going from a single prototype to a production run. There is a good talk by Kerry Scharfglass - @borgel about the process and economics of building a badge.
Background
When developing the badge this year, we found the form long before the function. I think its safe to say that where our team typically struggles is figuring how to make the badge look cool AF! Given that the electronics badges were all reserved in 24 hours we feel like at least came close to achieving it! We started with finding something that we could use to build on a theme and it actually sets us up for next year!
Because electronic badges are expensive to build and to keep the cost of attending the conference low, not everyone is fortunate enough to get a badge. This year, over 100 more people got electronic badges over last year including participants, speakers, volunteers and organizers. Due to the fore mentioned cost issues, only 250 attendees were able to get electronic badges when preregistration was launched. The limited stock was all reserved in 24 hours nearly 3 months before the conference.
Part of the challenge in planning for badges is estimating the number of attendees. This year the conference saw an increase in attendance from 500 to 700! We once again ran out of even the bare PCB badges again this year because of last minute registrations far exceeding our expectations.
While the Attendee badges were all assembled by our vendor PCBWay, the Organizer, Speaker, Volunteer and Jr Hacker badges totaling 128 (7 bit) were all hand assembled not including prototypes that numbered well over a dozen.
The Hardware
![]()
The core of this years badge was the Espressif ESP8266 WIFI micro controller a step up from the ATTiny 85 from last year. Beyond the passive components to support the microcontroller, we included 6 reverse mount SMD LED’s that we could use for some bling.
The Badge
There were 6 different designs for the badge, all of which had the same from but different color schemes and text which were:
- Participant
- Speaker
- Organizer
- Volunteer
- Sponsor
- Pirate (more on this below)
This badge was the first that we have used a trick to allow light to pass from the back of the PCB to the front. We had actually looked into doing this last year for the SecKC Defcon 26 badge however it wouldn’t have worked with our design if we used the normal reverse mount LED’s. The biggest challenge in using these LED’s is the cost. Where a typical SMD LED costs 1-3 cents each, these can cost upwards of 30 cents each.
One great thing about working with Bsides organizers is that they like us want to give back to the community. To that end, all of the projects that we can are Open Source using either Creative Commons or MIT Licenses. If you want to make your own badge or fork the project to make something different the hardware and software files are available on our Github page
The Game
While we have used micro controllers in the past that have wireless capabilities, this badge was the first that we took advantage of them beyond just a passive way to broadcast snarky messages. This years event was held for the first time at the Westport Plexpod facility and the layout was very different from past locations. Working with the Bsides KC Team, we felt that we should try and use the badge as a way to get attendees to explore the venue as things were dispersed much more than last year.
What we came up with was to scatter WIFI beacons that we would use for the badge to discover as you wondered around similar to the Easter Egg in the Atari game “Adventure”. Take a look at the slides linked above if you want a more in-depth look at how the game was setup and what all went into it.
Non Electronic participants were not left out either. While the PCB was electrically the same, only the non-electronic badges had the clues for a Crypto challenge that was run during the conference.
It’s possible that we underestimated the resolve of some of the participants in the Crypto Challenge as it definitely drove some to the brink…
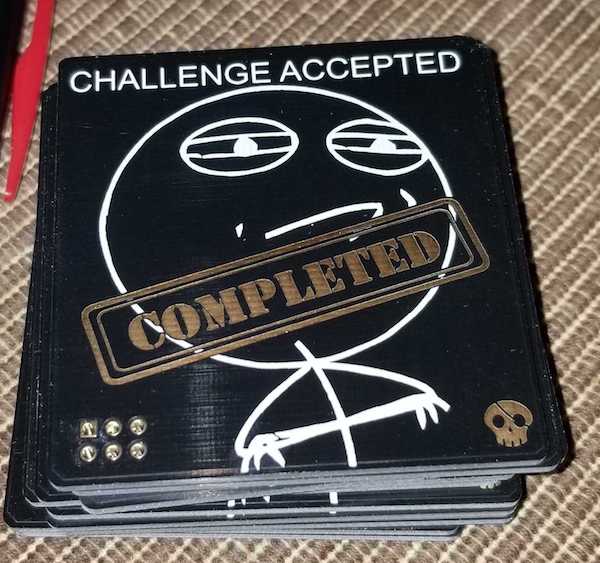
The solvers of the Crypto challenge received a specially designed “Challenge Accepted” contest SAO. Only 2 of them were awarded during the Con to one person who solved the Crypto challenge and one who won the counterfeit badge challenge.
Pirates Badge
One of the (few) benefits of designing a badge for a conference you will also be attending is getting to make your own ‘unofficial’ version of the badge. This goes back to our roots in making unofficial DEFCON conference badges. It’s hard to tell at first glance because the form is exactly the same although a different color scheme (Matte Black / Gold) and the illuminated text says ‘PIRATES’.
![]()
We really wanted to give it some color, however there are currently no RGB reverse mount led’s which limit how much bling we can bring to the badge. However, quite by accident last year while building another project we ran across a solution using WS2812 or Neopixel LED’s.
It turns out that RGB LEDs do look good from the backside (at least to us) but they are not mountable in reverse unless you do something like use blobs of solder or extra wires. What we came up with was to use a daughter board to give us an easy way to mount them normally and then attach it to the backside of the badge. This would still allow us to align them wherever we wanted the lighting and all with a profile stlll lower than the electrolytic capacitor on the badge or the battery holder. Be on the lookout for this to be used on some future projects.
Counterfeit Badge Contest
As happened last year for Defcon 26, it seems that any leak of images of badges before the Con is pretty much guaranteed to result in counterfeits. After a picture of this year BSides badge was released on Twitter we decided to embrace it and turned into a contest. The prize was to be an electronic badge given they were sold out on the first day.
There ended up being on a single entry however DiggerOfLogs made his own electronic version of the badge and did a great job. His prize was networkgeek’s Pirate badge as well as the first of the special contest SOA’s.
Junior Hacker (Kids) Badge
Just two weeks before Bsides KC 2018 we got an idea that it might be cool to have a separate badge for kids that attend given the Hakz4kids program however there wasn’t nearly enough time to make it happen. It was hard enough just to get the primary con badge done! Even so we started to brainstorm ideas that they would enjoy. The answer that we came up with was ‘Laser Tag’.
![]()
Of course, we had absolutely no idea how to actually do it and so the research began. Fortunately we a year to do so… To start with, we quickly figured out that Lasers are dangerous and thus probably not the right thing to put into the hands of our less ‘experienced’ hackers - mature/responsible adjectives intentionally unused. Infrared (IR) however seemed to be a much better way to go. There are certainly some trade offs as unless focused, IR is more scattershot like a shotgun than a laser rifle. Another thing we had to face is that IR likes to bounce off of surfaces so you could just as easily hit someone by shooting off a wall. Given that it was for kids in a small environment, we decided that we didn’t need to have incredibly strict standards and it could be a learning experience that the world isn’t fair…
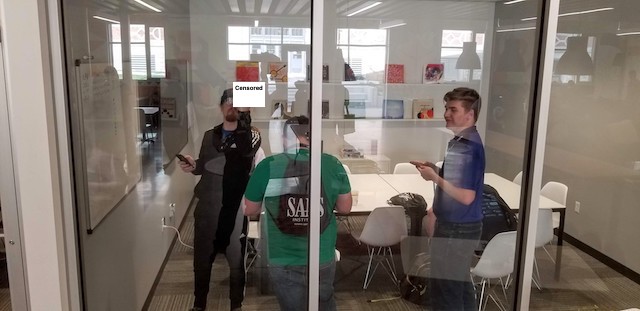
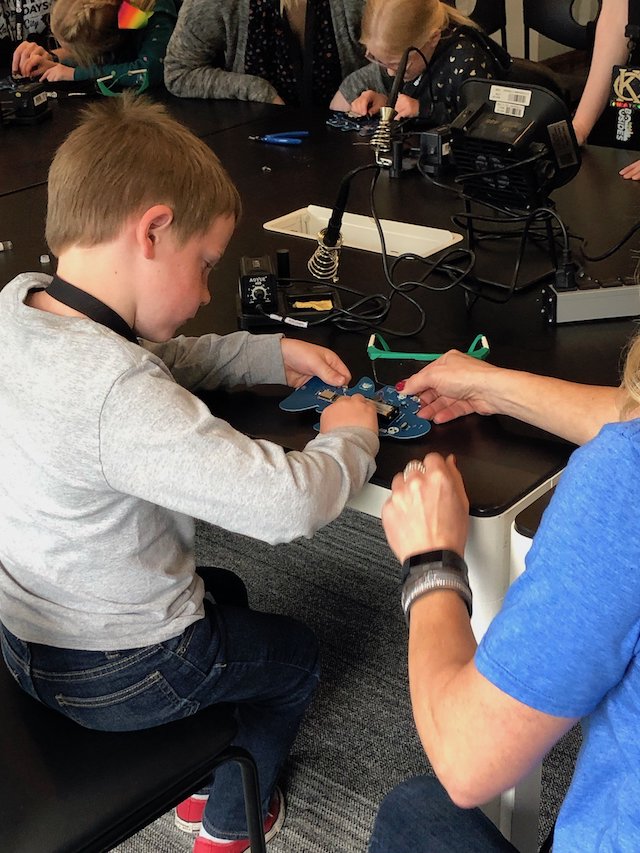
But with great power comes great responsibility. We decided to also use the badge as an opportunity for the kids to get a chance to do some soldering. There were plenty of through hole components on the badge (button, IR LED, IR RX, vibration motor, speaker) but we didn’t want them to do all of them. Originally we planned to have them do the IR LED and IR RX however we wanted to be able to test that functionality ahead of the conference so in the end we decided just to do the speaker. This actually brought joy beyond pewpew sounds as during startup due to Twitter demand, we decided to use the speaker to play “Baby Shark” each time it turns on (to the loathing of all parents).
The Kids Badge Hardware
To start with, we wanted to find a way to create a relatively simple yet inexpensive build platform. To start with, we thought maybe using the ATTiny85 however we had problems getting the IR library working but we might pickup with this path again. Moving beyond this, we started looking at the ATmega 328 however from a pricing perspective it was still relatively expensive. Good for us, we already developed a hardware platform around the ESP8266 that was at or less expensive than the ATMega 328.
When researching the IR we found that we were going to need a way to drive the IR LED at a higher current than can be driven from a GPIO pin. This required the use of a transistor to ‘switch’ the current to be drawn directly from the battery source as we wanted to approach the max current of 100ma that the IR LED could handle. This was our first time using a transistor on one of our badges. Combined with a currently limiting resistor to ensure that we didn’t overdrive the IR LED we had a functional way to transmit codes at long distances.
As any good project, we started with the goal of allowing you to simply tag the other person but it quickly spiraled into never ending scope creep. First, laser tag absolutely has to have sound effects so we decided to integrate a speaker. This is simple enough to just buy some Piezo’s and connect to a GPIO pin. However, we learned that there is a difference between a Piezo buzzer and a Piezo speaker (delay 3 days and an extra $50).
Second, when messing around in the lab after getting badge to trigger a sound when you got hit, someone came up with the bright idea that it should have some force feedback. We discovered that there are these simple vibrating motor disks that could be used (add $30)
Last, we thought about having a hit counter (add another $50). Originally we were going to use some simple LED’s but because of the limited GPIO pins we decided to use the WS2812s as we can drive a large number with a single pin. There was also a thought that we could do a Red vs Blue team but we ran out of time to code it and will be included in a future release.
Testing
The biggest concern we had was that we could end up burning out the IR LED so we wanted to make sure that we tested it well. This ended up being quite simple by putting to of the badge development platforms back to back, and making each one return fire when it got hit. We left this ran for 24 hours and when we came back they had tagged each other over 300,000 times which we figured would probably exceed the mechanical life of pewpew button itself!
![]()
Even though we ordered the components more than 50 days before the conference, the IR LED’s showed up 3 weeks after…(add $25)
Lessons Learned
Beyond the scope creep and component sourcing issues, the only real problem that we ran into this year during the conference was that of battery life. We got a really good deal on some alkaline batteries but the quality turned out to be crap. While a majority of badges didn’t make it through the con, some had to get a new set (or three). There were extras to be had however next year we will be doing battery tests to ensure they live up to our expectations.
Making Badges is so much more than an electronics project and has pushed our team to learn about all sorts of things that we had never even considered before. Ready to order badges in February…Chinese New Year (delay 2 weeks). Budgeted x amount for the project, tariffs slapped on imported electronics. Plan, plan more and plan agin has become the most important part of the project and we are getting much better at it!
Thank you all who stopped to tell us how much you enjoyed the badges, workshop and contests and we hope to see you all again next year!